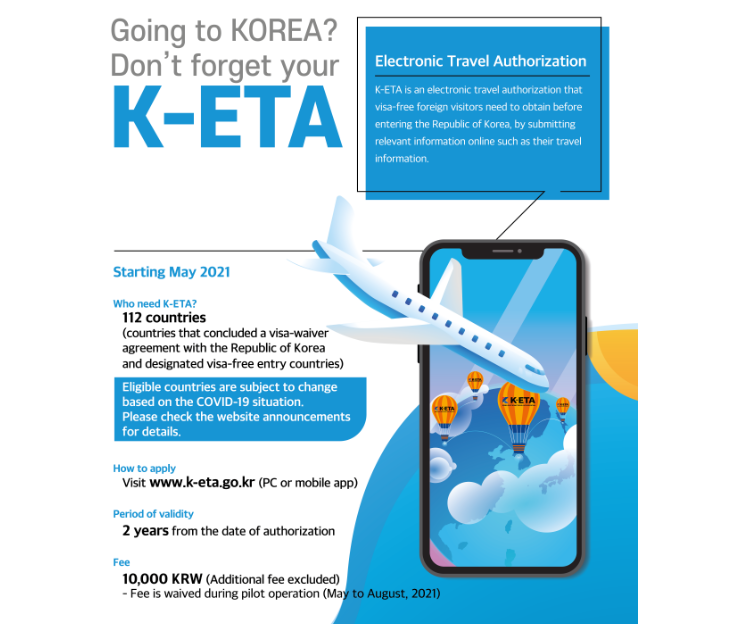
Are you planning a trip to South Korea in 2026? The K-ETA (Korea Electronic Travel Authorization) is the digital key for visa-free travelers, costing 10,000 KRW (approx. $7 USD). While the process is digital, strict technical requirements regarding photos and addresses often cause travelers to give up in frustration. In this guide, I will clarify the list of major visa-free countries, help you troubleshoot the specific “Error Messages” you might be facing right now, and explain how to streamline your entry process using the Electronic Arrival Card.
- Visa-Free Countries & The 2026 Exemption List
- Troubleshooting: Why Your Application Might Fail
- The Photo Struggle: Specs and Resizing Tips
- Step-by-Step Application Walkthrough
- Pro Tip: Skipping the Paperwork
- FAQ: Common K-ETA Questions
Visa-Free Countries & The 2026 Exemption List
South Korea allows travelers from over 110 countries to enter without a visa for short-term stays (tourism, business meetings, family visits). Generally, these travelers must apply for a K-ETA. However, as of January 2026, a temporary exemption is active for 22 specific countries/regions until December 31, 2026.
Major Visa-Free Countries
Below is a list of nations that are granted visa-free entry statuses. I have marked those currently exempt from the mandatory K-ETA requirement.
| Region | Country | K-ETA Requirement (2026 Status) |
|---|---|---|
| Americas | United States (Guam include.), Canada | Exempt (Application Optional) |
| Brazil, Mexico, Chile | Mandatory | |
| Europe | United Kingdom, Germany, France, Italy, Spain, Poland, Netherlands, Belgium, Denmark, Norway, Sweden, Finland, Austria | Exempt (Application Optional) |
| Turkey, Russia* (Conditional) | Mandatory | |
| Asia & Oceania | Japan, Taiwan, Singapore, Hong Kong, Macau | Exempt (Application Optional) |
| Australia, New Zealand | Exempt (Application Optional) | |
| Thailand, Malaysia | Mandatory |
*Note: Visa-waiver agreements can change based on diplomatic situations. Always check the latest status for countries like Russia.
Troubleshooting: Why Your Application Might Fail
Are you currently staring at an error screen? Before we dive into the “How-to,” let’s address the specific roadblocks that stop 90% of applicants. Identify your problem below to find the immediate fix.
Common Error Scenarios
- ⛔ Error: “File size exceeds limit (100KB)” or “Unable to process photo”
Most smartphone photos are 2MB~5MB. The K-ETA system strictly rejects anything over 100KB. You cannot just crop it; you must compress the file data. - ⛔ Error: “Postal code does not match”
You are likely searching for the hotel name (e.g., “Grand Hyatt Seoul”). The Korean system relies on the 5-digit “Road Name Address” postal code. Searching by building name often returns zero results. - ⛔ Error: “Session Timed Out”
The security settings on the official site are aggressive. If you take more than a few minutes to find a file or type an address, the page resets, and you lose all data.
The “Preparation Fix” Checklist
To bypass the errors above, have these four items ready on your desktop before you click the “Apply” button.
- 1. Valid Passport: Ensure at least 6 months of validity remains.
- 2. Pre-Edited Photo: A JPG file, resized to under 700×700 pixels and compressed to under 100KB. (See the detailed guide below).
- 3. Accurate Address Data: Have the 5-digit Korean Postal Code and the English Road Name of your accommodation saved in a text file to copy-paste quickly.
- 4. Payment Method: A credit/debit card ready for the 10,000 KRW fee.
The Photo Struggle: Specs and Resizing Tips
The photo upload is the biggest technical hurdle. The official requirements are strict, but here is the cheat sheet to get it right the first time.
| Requirement | Specification | Local Insider Tip |
|---|---|---|
| File Type | JPG or JPEG only | PNG or HEIC (iPhone default) files will trigger an error. |
| File Size | Less than 100KB | This is extremely small! Use a free online tool like “TinyJPG” to compress your image. |
| Dimensions | 700 x 700 pixels (Max) | Crop the photo to a square showing only your face and shoulders. |
| Background | White or Light Color | A selfie against a white wall works, but avoid heavy shadows. |
Step-by-Step Application Walkthrough
Navigate to the only official website: www.k-eta.go.kr. Do not use any other site. Here is how to navigate the tricky sections safely.
1. Passport Upload & OCR
You will upload your passport bio-page. The system uses OCR to auto-fill your details.
⚠️ Critical Warning: The system frequently confuses the letter ‘O’ with the number ‘0’. Manually double-check every character. If your passport number is wrong on the K-ETA, you will be denied boarding at the airport.
2. The Address Search (The Hardest Part)
Korean addresses use a specific “Road Name” system.
- Step 1: Click “Find Postal Code.”
- Step 2: Search using the 5-digit postal code (e.g., 04340) rather than the hotel name.
- Step 3: Select the matching English road address (e.g., 322 Sowol-ro, Yongsan-gu).
- Step 4: In the “Detailed Address” box, manually type the Hotel Name and Room Number.
Pro Tip: Skipping the Paperwork
One of the massive benefits of having an approved K-ETA—even for exempt countries—is the exemption from the paper Arrival Card. However, there is another digital form you should know about to speed up your entry even further.
📌 Recommendation: For a completely paperless airport experience, you should also check the guide on the Electronic Arrival Card (often related to Q-Code/Health or Customs) procedures.
For a detailed breakdown on how to complete the electronic entry process, read our full guide here: Korea E-Arrival Card Guide: Mandatory Steps for Travelers.
FAQ: Common K-ETA Questions
Can I edit my application after submission?
Once the fee is paid, you cannot change critical information like your name, passport number, or date of birth. If you made a mistake here, you must re-apply and pay again. However, you can update your accommodation address on the “K-ETA Results” page after approval.
The site says “Under Assessment.” What should I do?
This usually means a manual review is required, often due to a photo that isn’t clear or a name match issue. It typically resolves within 24-72 hours. If your flight is tomorrow, contact the K-ETA center inquiry form immediately.
Do I need to print the K-ETA?
While the system is digital, I always recommend carrying a physical printout. Phone batteries die, and airport WiFi can be spotty. A piece of paper is the ultimate backup plan.
Prepare for your trip with confidence. Check out our detailed guides on transport and local apps.
Korean Culture portal KCulture.com

Founder of Kculture.com and MA in Political Science. He shares deep academic and local insights to provide an authentic perspective on Korean history and society.